Read this guide to learn how to rename an Azure subscription using the Azure portal or PowerShell from your computer or Azure Cloud Shell.
Option 1: Rename your subscription through the Azure Portal
- Log in to portal.azure.com and search for: applicationClick , then select Subscriptions.


- Then click on the subscription you want to rename.


- Click here for the last time Change name Click the button, give your subscription a new name and click. get.


Option 2: Rename with PowerShell on your computer
- Open PowerShell 5.0 with administrator privileges on your computer and run the command below.
Connect-AzAccount
- Then, in the sign-in pop-up, select the account you want to sign in to Azure with. If you need to sign in with an account that is not listed, select Next. Please use a different account.


- Then enter your Azure email account and then your password.


- Finally, run the commands below to install the required PowerShell modules and change the name of your Azure subscription.
#1. Install and import the Az.Accounts and Az.Subscription modules. Without this, the Rename-AzSubscription command will not be availableInstall-Module -Name Az.Accounts, Az.Subscription -Force
Import-Module Az.Accounts, Az.Subscription -Force#2. Return all subscriptions in your Azure tenant
get-AzSubscription
#3. Rename the subscription
Rename-AzSubscription -Id 107adc00-2694-430e-b985-d2639d9e1eef -SubscriptionName "AZ-100 Lab"
#4. Check that the subscription has changed
get-AzSubscription
Option 3: Rename via Azure Cloud Shell PowerShell
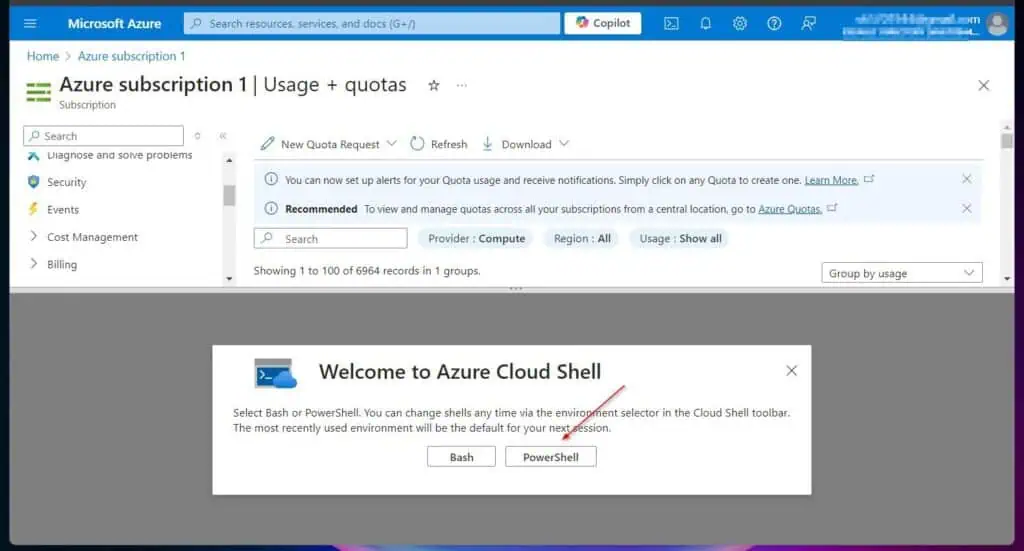
- Sign in to portal.azure.com and click the Azure Cloud Shell icon to open it.


- If this is your first time opening Azure Cloud Shell, set it up for the first time according to the numbers in this screenshot.


- Finally, run the commands below to install the required modules and rename your Azure subscription.
#1. Install and import the Az.Accounts module. Without this, the Rename-AzSubscription command will not be availableInstall-Module -Name Az.Subscription -Force
Import-Module Az.Subscription -Force#2. Return all subscriptions in your Azure tenant
get-AzSubscription
#3. Rename the subscription
Rename-AzSubscription -Id 107adc00-2694-430e-b985-d2639d9e1eef -SubscriptionName "AZ-100 Lab"
#4. Check that the subscription has changed
get-AzSubscription
conclusion
Part of the Azure Infrastructure Administrator role involves managing subscriptions, and sometimes renaming them. In this quick guide, we’ve shared three ways to do this: from your computer, through the Azure Portal, through Azure Cloud Shell, and through PowerShell.
I am confident that you have achieved your goal of reading this guide by using one of these methods. Our “Was this page helpful?“The question is below.


